
If you have been following this site, you will have noticed that this summer we purchased our first canoe and took it on it’s first trip. Now comes the time when we need to figure out how to store it over the winter. There are some people who would do this outside, but we are looking to have it stored in our garage.
Having the canoe in the garage means a few things…
- Measuring the space to make sure it actually fits
- A good plan (which means watching lots of YouTube videos and asking people online what they do)
- Buying all the gear
- Rigging up the canoe (with hopefully very little errors)
After having one of our vehicles spend a few weeks outside (read hubby upset that windows are dewy in the mornings), we finally sorted out a plan and headed the hardware stores. Yes, plural… we ended up going to 3 different stores to get what we needed. (Dan had to return to a store at the end of all this).
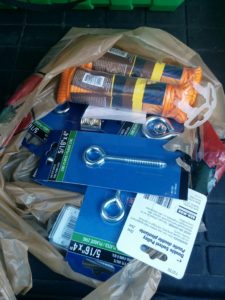
Our list of supplies:
- 1 piece of 2 by 4 by 8 (cut in half)
- 4 single pulleys
- 2 double pulleys
- 4 c-shaped locking carabiners
- 4 eye hole screws
- 6 eye hole lag bolts with nut
- 6 washers for the lag bolts as they didn’t come with any
- 100 m of paracord (rated for 100lbs) (this was cut to fit the length we needed)
- 1 piece of 2 by 2 by 8
- 1 piece of reinforcing angle bracket
- 4 small corner brackets
- 4 pieces of carpet (leftover from when our house was built 12 years ago – yes pack rats here!)
Equipment needed:
- drill and bits to make pilot holes
- screwdriver
- screws
- ladder
- knife and lighter to cut and seal paracord ends
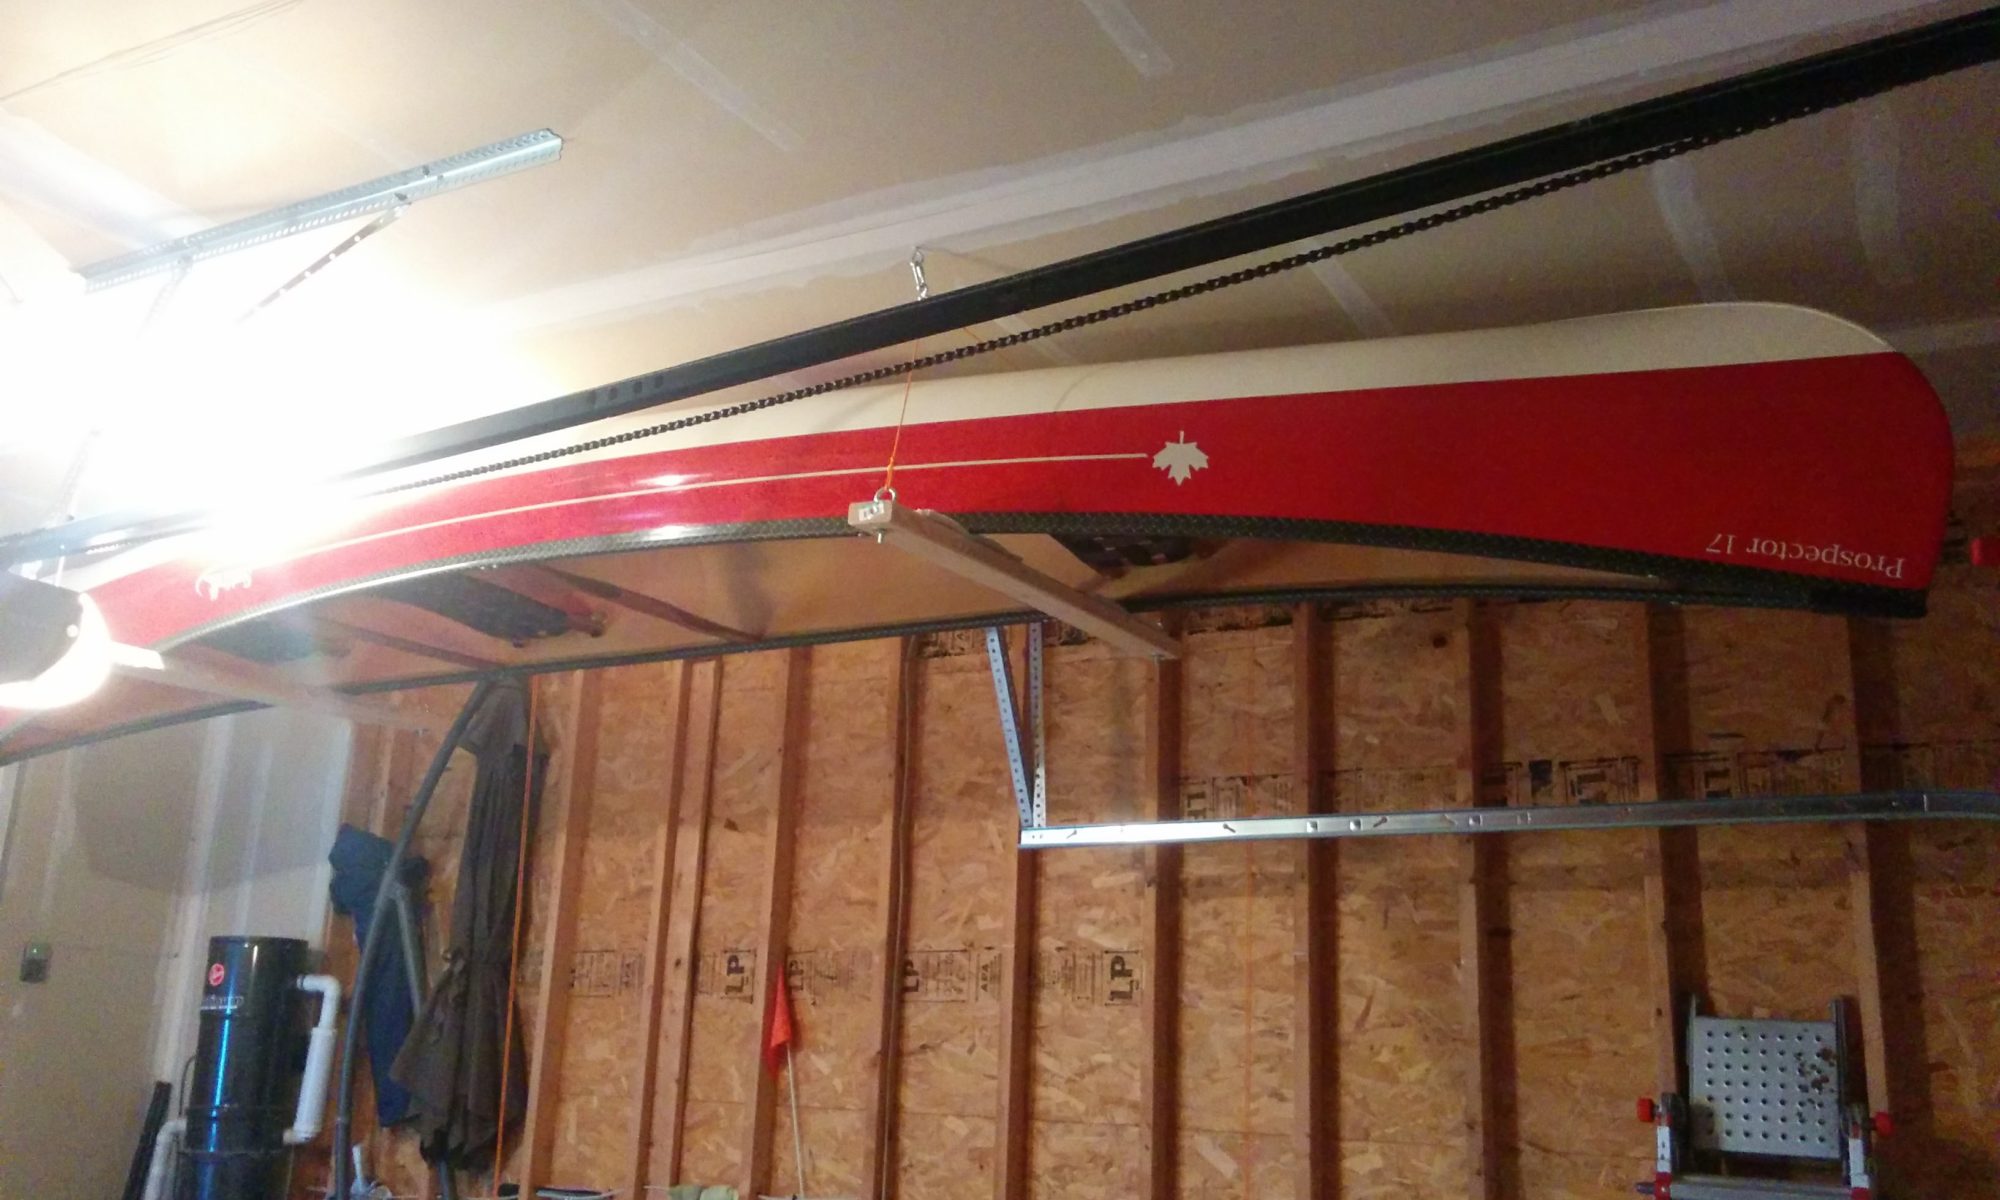
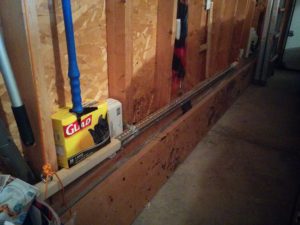
In our garage, we knew where the eye screws would go in the ceiling since we wanted to place these in existing joists. We are also constricted with location away from the wall since it has to fit above our garage door and away from the garage opener.
What we did on the ceiling in the two locations where we would hang the rack.
- Drilled hole in ceiling a few inches from the wall, insert eye screw, attach carabiner and double pulley.
- Drilled hole in ceiling 27 in from wall, insert eye screw, attached carabiner and single pulley
- repeat step 2 but with a distance of 3 1/2 ft from the second hole
- repeat steps 1-3 in the second location
That was easy going. Next was the boards that would hold the canoe:
- We then took the 2 by 4, cut it in half
- Drilled holes near the end lengthwise
- Insert the eye hole lag bolts. Each board will now have 2 eye bolts attached.
- Repeat with the 2 by 2 by 8.
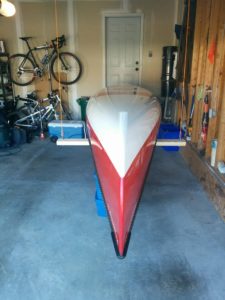
We placed these boards on our makeshift height measuring device (2 blue boxes and our cooler), which conveniently worked out to be about 3 feet off the ground. We had to use this height since we wanted to be able to hook our system to the wall and not have to pull ropes and adjust them for the correct height. It does mean that we have to load and unload the canoe when it is 3 feet off the ground and with the garage door partially open.
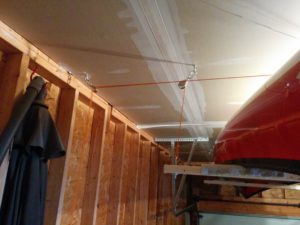
Next was getting the rope attached:
- String rope on each eye bolt and secure with bowline knot
- String it through the single pulley on the ceiling
- Then string through double pulley
- Repeat with each eye bolt
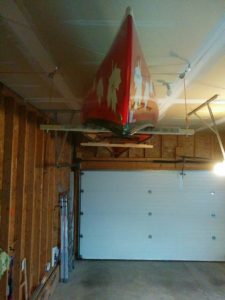
Now was the tricky part. We had to get the rope attached to the 2 by 2 so that it was level, and when we pulled on the system it would pull evenly and be able to hook on the angle brackets for storage.
We figured that if I was to do this I would need to reach it. That meant the angle brackets would be connected to the wall of the garage just about 7ft high. With that, Dan measured the distance from the ceiling and attached 2 of the angle brackets. He then held the 2 by 2 up while I tied the ropes on each end. Success.
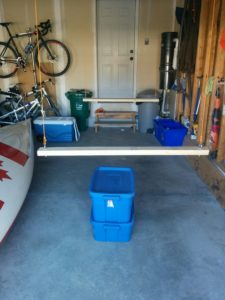
We then pulled the 2 by 2 down and the rack system went up to the ceiling! Yes! The last question was how low on the wall to place the remaining 2 angle brackets to hold the 2 by 2 when the canoe was loaded.
This meant a trial with the canoe on the rack! Meep! I was a bit nervous. At first we didn’t have the angle metal on the 2 by 2 and it started to bend in the middle when we tried to pull on it. I got really nervous at this point and insisted this had to be fixed. That meant Dan had to do another trip to the hardware store.
With the system now in place, the canoe loaded, we actually left the canoe at its lowest height for a few days. JUST IN CASE. When we watched videos, there are horror stories of homemade systems failing. We had to make sure this would happen.
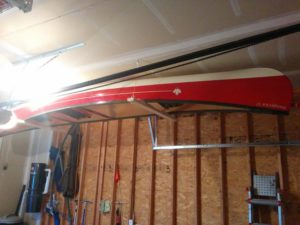
Now our canoe is safely stored and I can actually lower and raise it with confidence. If you are reading this to help with your system, I hope the info, pictures and videos help you!

Very interesting! I’m going to pass this info on to my brother, who has a canoe (and a garage). The pulley system is really smart. With winter coming on this might be something he’ll want to know about.
I had a few people ask me about what we did, and I asked a lot of people what they did. WE ended up researching and developing this for our garage. Obviously it can be altered depending on your space, but it gives someone a start.